Purchase Orders
The Create PO screen can be opened from the home page > Inventory > Purchase Order > New Order
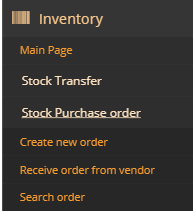
Or from the menu > Inventory > Stock Purchase order > Create new order
Create PO

Click the New Order link in the Purchase Order screen. The New PO screen displays. Select the vendor/Supplier, enter the vendor invoice number if available (optional), and the rest of the fields are auto populated. Then click Save.
Create PO screen

Screen Data Elements -
The billing and shipping sections are auto populated
|
Elements |
Type |
Action |
|
PO No. |
Alphanumeric |
Enter PO reference, auto populated when not entered. |
|
PO Date |
Date |
PO Date – select from calendar if required |
|
Vendor/Supplier |
box |
Type the first 3 letters of the supplier’s name (in MT-POS, this is the distribution center or vendor), and then select the supplier |
|
Terms |
Select from list |
Select the Payment Terms |
|
Vendor Order |
Alphanumeric |
Type the Vendor Sales Order Number, if available |
|
Vendor Invoice |
Alphanumeric |
Vendor Invoice Number, if available |
|
Bill to Store |
text |
Store name |
|
Bill to Address |
Text |
Store billing Address |
|
|
Text |
Store Email |
|
Phone |
Numeric |
Store Phone |
|
Ship to Store |
Numeric |
Store name |
|
Ship to Address |
Text |
Store shipping Address |
|
Phone |
Numeric |
Store Phone |
|
Ship By |
Select from list |
Select shipping method |
|
Save |
button |
Click to save and continue |
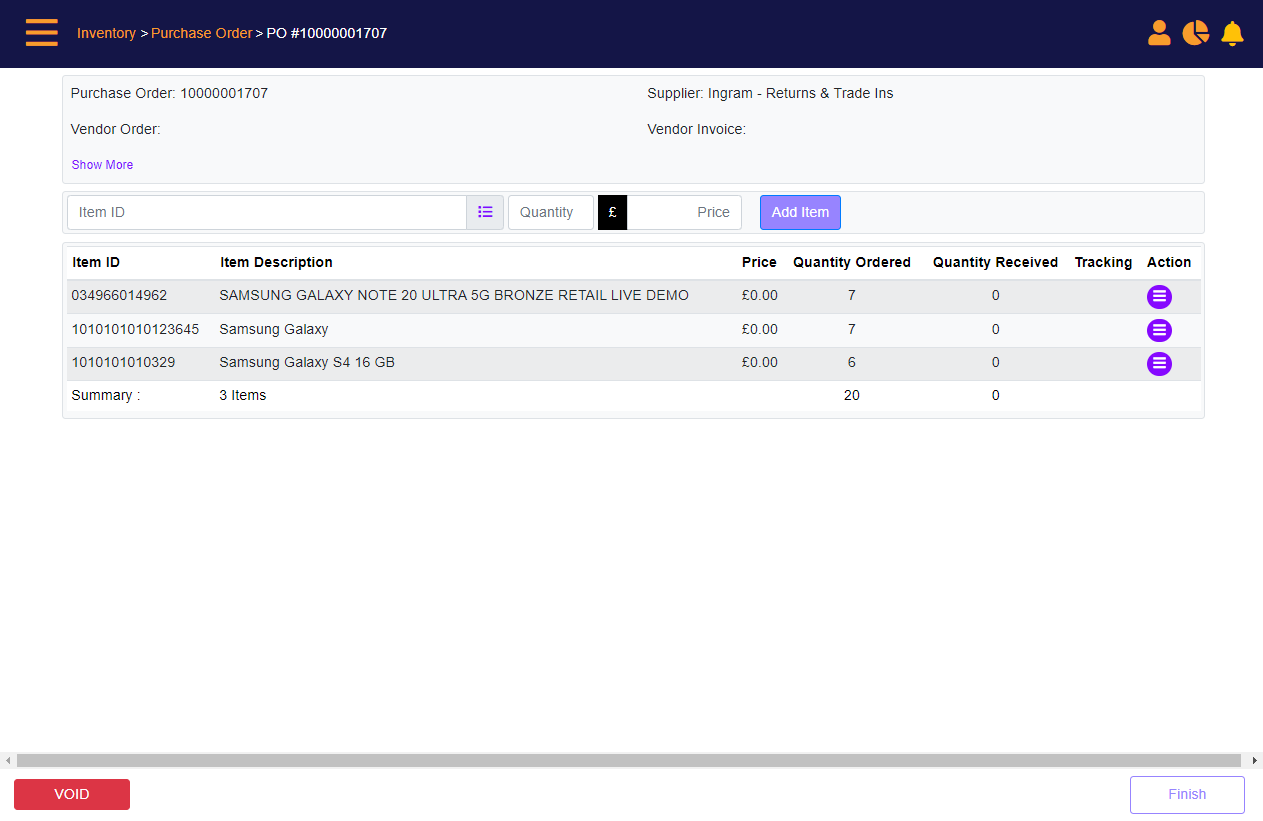
Scan an item or enter the SKU manually. Enter the quantity and the price per item (optional), and then click Add Item.
Both serialized and non-serialized products can be entered in the same purchase order. When done, Click Finish.
MT-POS – PO screen

You can add items to the order by using the catalog. Access to the Add Items to Order screen is from the PO screen, list icon (near the Item ID box).
Add items to order

Screen Data Elements
|
Elements |
Type |
Action |
|
Source |
Select from list |
Select the source for the product filter, for example, Master Catalog or Suggested Items |
|
SKU or Description |
Box |
Type partial SKU or partial description |
|
Category |
Select from list |
You can select the main category as well as subcategory 1,2,3 |
|
Show items from all suppliers |
Checkbox |
Check-mark so display items from all suppliers (not only the selected supplier in PO) |
|
Apply Filter |
Button |
Filters the search according to selected criteria |
|
Matching product |
List |
List of matching search results |
|
Product (description) |
Link |
Link to the catalog definition page |
|
Item ID number |
Read-only |
number |
|
Quantity In Stock |
Read-only |
Quantity on hand at the store |
|
Cost Per Item |
Box |
Enter the cost price per item |
|
Quantity To Add |
+/- icons |
Type the quantity or click the +/- icons |
|
Add |
Button |
Click to add the product to the PO |
|
Return to Order |
Button |
Return to the PO |
Items added to PO
In the Finish panel, select between Save and Continue Later, Submit for Approval, Approve the PO now, or Approve and Receive now. Once the option is selected, click Finish.
PO – Finish panel

Screen Data Elements
|
Elements |
Type |
Action |
|
|
Show Less/Show More |
Link |
Click to hide/unhide some of the information |
|
|
Document No |
Read-only |
MicroTelecom Internal Reference number of the PO |
|
|
PO Date |
Date |
PO Date – select from calendar if required |
|
|
Vendor/Supplier |
Box |
Type the first 3 letters of the supplier’s name and then select the supplier (in MT-POS, this is the distribution center or vendor) |
|
|
Terms |
Select from list |
Select the Payment Terms |
|
|
Vendor Order |
Alphanumeric |
Type the Vendor Sales Order Number |
|
|
Vendor Invoice |
Alphanumeric |
Vendor Invoice Number |
|
|
User Information |
|||
|
Created By |
Read-only |
User ID who created the PO |
|
|
Approved By |
Read-only |
User who approved the PO |
|
|
Created ON |
Read-only |
Date and time PO was created |
|
|
Billing and Shipping |
|||
|
Bill to Store |
text |
Store name |
|
|
Bill to Address |
Text |
Store billing Address |
|
|
|
Text |
Store Email |
|
|
Phone |
Numeric |
Store Phone |
|
|
Ship to Store |
Numeric |
Store name |
|
|
Ship to Address |
Text |
Store shipping Address |
|
|
Phone |
Numeric |
Store Phone |
|
|
Ship By |
Select from list |
Select shipping method |
|
|
Item ID |
Box |
Enter the Item ID (SKU) |
|
|
Menu |
Icon |
Click to open the catalog to search for and select the product |
|
|
Quantity |
Box |
Enter the quantity |
|
|
Price |
Money |
Enter the price per item |
|
|
Add Item |
button |
Click to add the item to the PO |
|
|
Item ID |
Read-only |
Product SKU |
|
|
Item Description |
Read-only |
Product description |
|
|
Price |
Read-only |
Product cost |
|
|
Quantity Ordered |
Read-only |
Quantity ordered |
|
|
Quantity Received |
Read-only |
Quantity received |
|
|
Action |
Menu |
Click the menu icon to open the menu |
|
|
Remove |
Menu option |
Remove the product from the PO |
|
|
Modify |
Menu option |
Modify item description, price, and quantity |
|
|
VOID |
Button |
Void the PO |
|
|
Finish |
Button |
Go to the Finish panel |
|
|
Finish panel |
|||
|
Print Note |
Alphanumeric |
Type a note to be printed with the PO |
|
|
House Note |
Alphanumeric |
Type a house note (not printed) |
|
|
Save and continue editing this purchase order later |
Button |
Save; continue editing this purchase order later |
|
|
Purchase order looks good, submit it for approval |
Button |
Submit the PO for approval |
|
|
Approve this purchase order now, it will be received later |
Button |
Approve this purchase order now |
|
|
Approve and receive this purchase order now |
Button |
Approve and receive this purchase order now |
|
|
|
Button |
Print the PO (on iPad download a PDF file) |
|
|
Finish |
Button |
Finish the process |
|