Create a new return order
The following describes how items are sent from the store to the warehouse (distribution center).
You will perform the following steps:
- On the Return to Warehouse screen, click New Warehouse Return.
- Select the target warehouse.
- Select the items to be returned. You can either scan the serial number and SKU, add the items from catalog list.
- For serialized items you can scan the item's serial number in ItemID/SN box, and this item will be removed from the inventory.
- Select the reason code.
- For non-serialized items you can scan the SKU and then enter the quantity. Items will be removed from the inventory.
- You can click on the Void button to void the order, and all the scanned items will be added back to inventory.
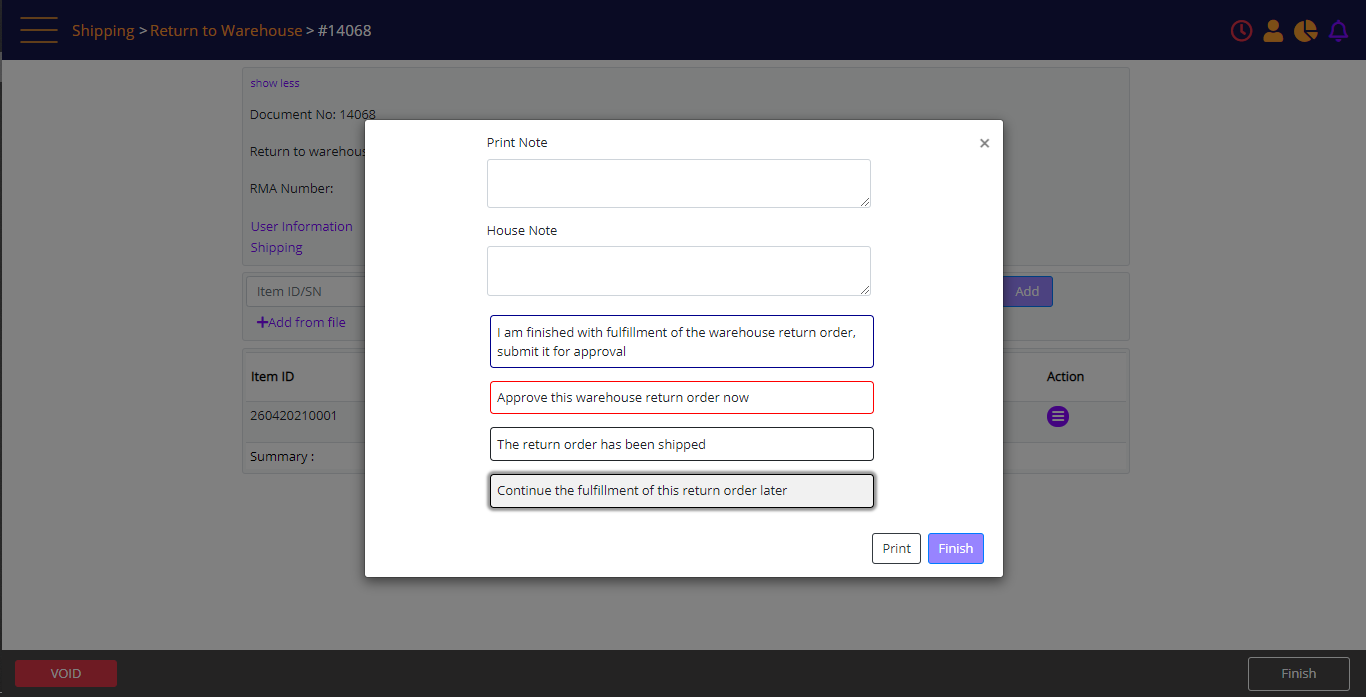
- Click Finish to complete the return to warehouse order, and select the required status.
- Print a packing list for RTW.
Depending on the business process, the applicable status for Store-to-Warehouse transfer can be one of the following:

Screen Data Elements
|
Elements |
Type |
Action |
|
Print Note |
Box |
Type a note to be printed on the Warehouse Return |
|
House Note |
Box |
Type a note for internal reference on Warehouse Return |
|
I am finished with fulfillment of the warehouse return, submit it for approval |
Button |
Submit the warehouse return order for approval |
|
Approve this warehouse return order now |
Button |
Approve the warehouse return order |
|
The warehouse return has been shipped |
Button |
The warehouse return order has been shipped |
|
Continue the fulfillment of this return later |
Button |
Continue the fulfillment of this return later |
|
|
Button |
Print the warehouse order (on iPad download a PDF) |
|
Finish |
Button |
Finish |