Service Plans Management
The plans available to be applied to a device in MT-POS shopping cart screen need to be pre-configured using MT-POS service plan management screen.
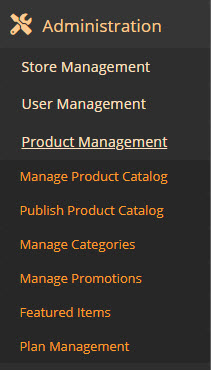
The Plan Management utility can be opened from the Administration menu > Product Management > Plan Management.

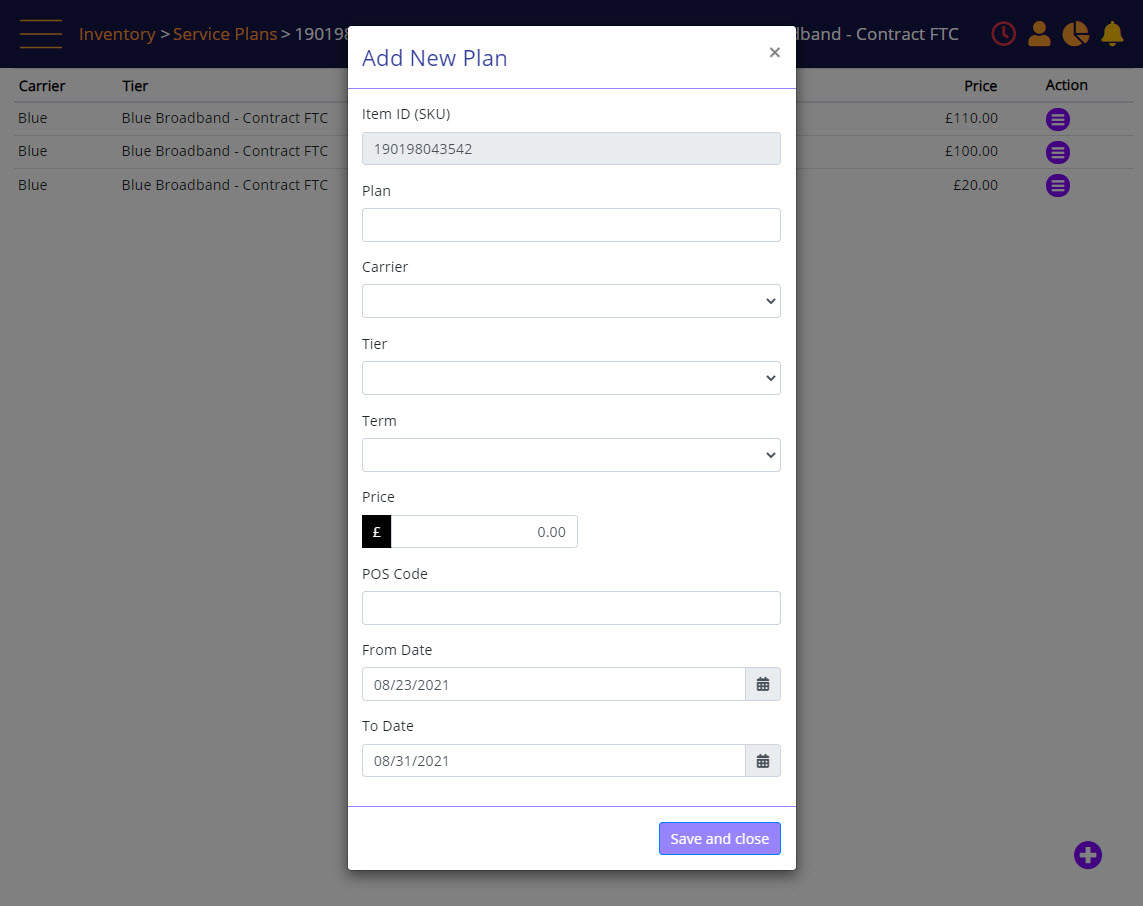
On the Service Plans screen, select the Add (+) link to create a new plan. In the Add New Plan panel:
- Enter the Item ID of the product to which the plan will be applied.
- Enter the plan, and then select the Carrier, Tier and Term.
- Enter the plan price for the device, applicable when selling with plan.
- Enter the MT-POS Code for the plan and select the Start and End dates.
- Click the Save and Close button.
Add/Edit a Plan

Screen Data Elements
|
Elements |
Type |
Action |
|
Item ID (SKU) |
Type-in box |
Enter the Item ID of the product to which the plan will be applied |
|
Plan |
Select from list |
Name the Plan |
|
Carrier |
Select from list |
Select the Carrier. Pre-configured in System. |
|
Tier |
Select from list |
Select the Tier |
|
Term |
Select from list |
Select the Term. Pre-configured in system. |
|
Price |
Type-in box |
Enter the product price according to the payment terms defined |
|
POS Code |
Type-in box |
Enter the POS Code for the plan |
|
From Date |
Select from list |
Select the start date |
|
To Date |
Select from list |
Select the end date |
|
Save and Close |
Button |
Save the updates |
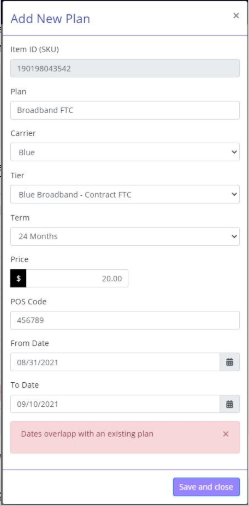
If the date of the newly created plan is overlapping with an existing plan which has the same attributes, you will get an error message “Dates overlap with an existing plan”
